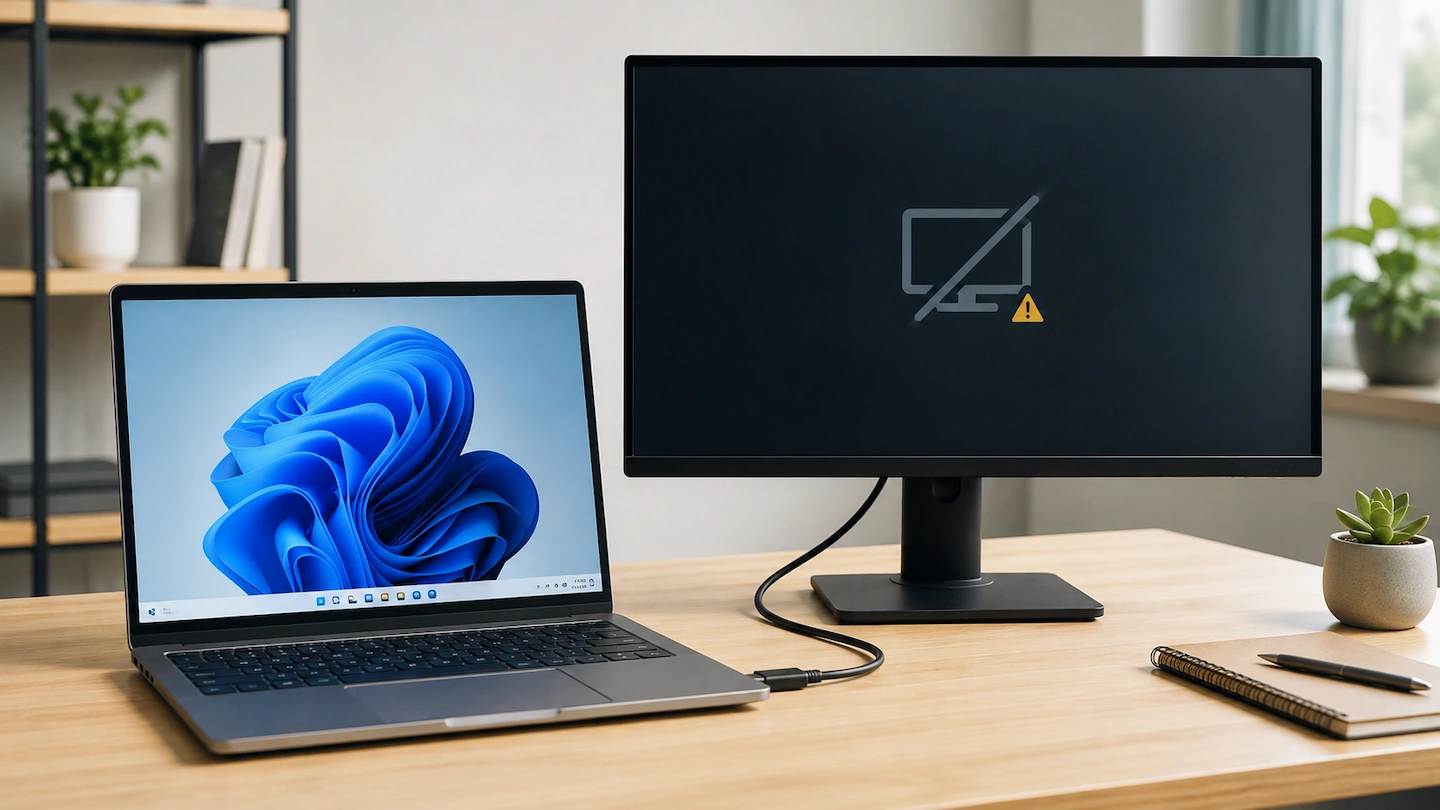
If your laptop won’t detect a second monitor, the best place to start is by checking whether Windows can see the display at all.
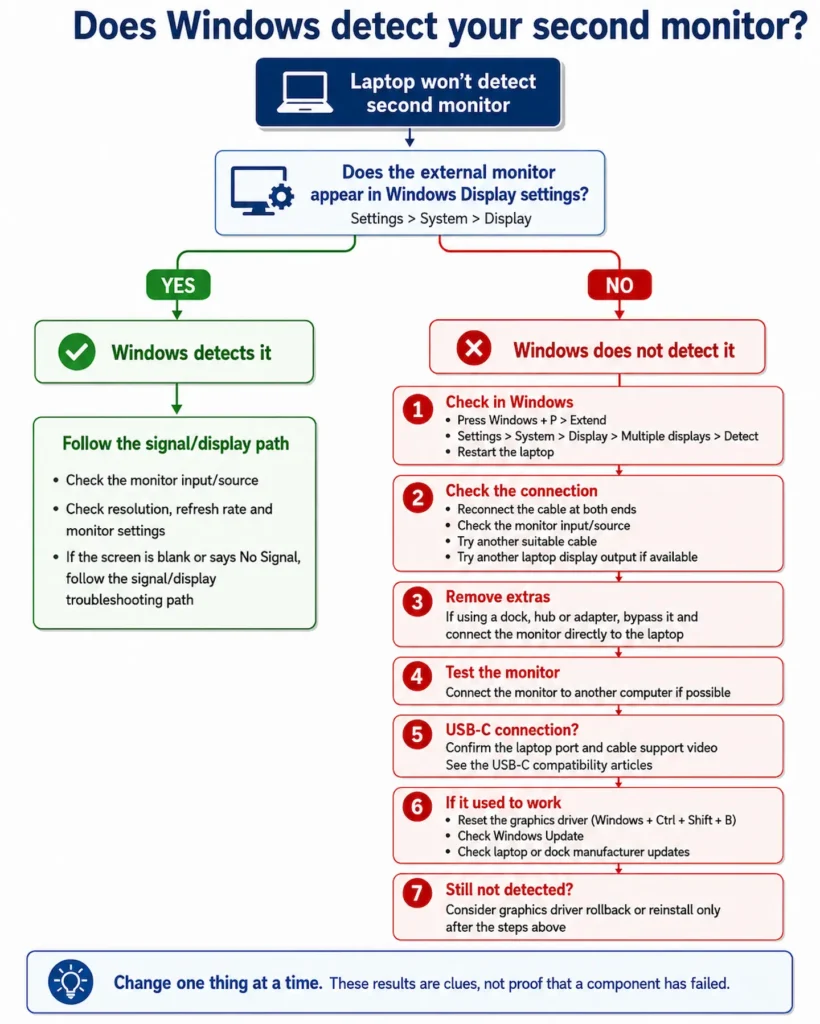
A monitor that is completely missing from Windows Display settings is a different problem from one that Windows recognises but which stays blank or shows No Signal. The checks below will help you narrow the problem down without jumping straight to drivers, firmware or replacement hardware.
Quick answer: If your laptop is not detecting a second monitor:
- Open Settings > System > Display and check whether a second display appears.
- Press Windows + P and select Extend.
- If the monitor is still missing, open Settings > System > Display > Multiple displays and select Detect.
- Restart the laptop.
- If Windows still cannot find the monitor, check the cable, monitor input and connection path before changing drivers.
If Windows already shows two displays but the external monitor is blank or says No Signal, Windows is detecting it. The problem is then more likely to be with the display or signal rather than detection.
Laptop Won’t Detect a Second Monitor: What This Usually Means
When Windows cannot detect a second monitor, something is interrupting the display connection between the laptop and monitor.
That connection may be direct:
Laptop → cable → monitor
Or it may include a dock, hub or adapter.
An undetected monitor does not automatically mean the monitor is faulty. The useful first question is whether the external display appears in Windows Display settings at all.
What to check first in Windows 11
Check whether the monitor appears in Display settings
Open:
Settings > System > Display
Look at the diagram near the top of the page.
If Windows shows two numbered displays, it has already detected the external monitor.
If Windows can see the monitor but the picture flickers, flashes or briefly cuts out instead, External Monitor Flickering or Cutting Out: What to Check First follows the connection, display-setting and graphics checks in a more useful order.
That is an important clue. Repeatedly asking Windows to detect it is unlikely to solve a blank-screen problem if the monitor already appears here.
If Windows shows only the laptop display, continue with the next checks.
Microsoft also distinguishes Identify from Detect. Identify shows you which numbered display is which after Windows has recognised them; Detect is the option used when another connected display is missing from Settings.
Press Windows + P and select Extend
Press:
Windows + P
A panel should appear with several display options.
For a normal two-screen setup, choose Extend. This lets Windows use the laptop screen and external monitor as separate parts of one desktop.
Windows normally offers four choices:
- PC screen only
- Duplicate
- Extend
- Second screen only
If selecting Extend does not make the monitor appear, continue. This is a quick setting to rule out, not a fix for every undetected display.
Ask Windows to detect the monitor
Go to:
Settings > System > Display > Multiple displays
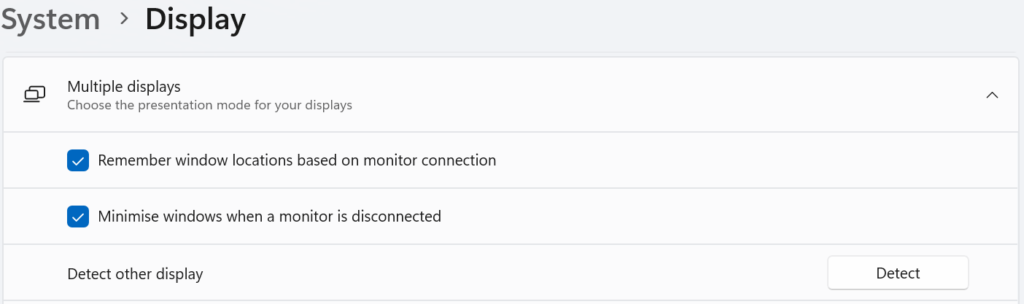
Select Detect.
Windows will check for another connected display. Microsoft recommends using Windows + P to choose how multiple displays are used and Detect when a connected display does not appear in Windows settings.
If Windows still cannot find another display, move on. Repeatedly pressing Detect is unlikely to give you useful new information.
Restart the laptop
Before changing cables or moving into more technical troubleshooting, try a normal restart.
Save any open work, then use:
Start > Power > Restart
After Windows starts again, return to Settings > System > Display and check whether the monitor now appears.
If it does, stop there. A restart fixing the symptom does not necessarily tell you why the monitor disappeared, but there is no benefit in continuing to change settings once the system is working again.
Check the monitor and its physical connection
Reconnect the cable at both ends
Disconnect the display cable from both the laptop and monitor.
Before reconnecting it:
- look for obvious damage to the connector;
- make sure the plug is not bent or loose;
- check that there is no debris preventing it from seating properly.
Reconnect the cable firmly at both ends, wait a few seconds and check Windows Display settings again.
Microsoft recommends checking that display cables are properly connected before moving on to more involved troubleshooting.
Make sure the monitor is using the correct input
Most monitors can accept more than one type of connection.
Depending on the model, the input might be labelled:
- HDMI 1
- HDMI 2
- DisplayPort
- USB-C
- Input
- Source
Make sure the monitor is set to the input that matches the cable you are actually using.
For example, if the laptop is connected to HDMI 1, but the monitor is set to DisplayPort, you should not expect to see the laptop picture.
A wrong input does not explain every case where Windows fails to detect a monitor, so treat this as a quick check rather than proof of the cause.
Try another suitable cable
If you have another compatible cable available, try it while leaving everything else unchanged.
For example, replace the HDMI cable but keep:
- the same laptop;
- the same laptop port;
- the same monitor;
- the same monitor input.
Then check whether Windows detects the display.
If another cable works, the original cable becomes a strong suspect.
It is still better to think of this as a diagnostic clue rather than absolute proof. The aim is to change one part of the setup at a time so you can see what makes a difference.
Try another display output on the laptop
If your laptop has another suitable video output, try connecting the monitor through it.
For example, you might be able to test another HDMI port or a different video-capable connection.
Keep the monitor and cable the same where possible.
If the second connection works while the first consistently does not, the original port or connection path deserves more attention.
That does not necessarily mean the port is physically broken. Drivers, firmware, docking hardware and compatibility can also affect whether a particular connection works.
If you are using a dock, hub or adapter, bypass it
A dock, USB-C hub or display adapter adds another part to the connection.
Instead of:
Laptop → cable → monitor
you may have:
Laptop → dock → cable → monitor
or:
Laptop → USB-C adapter → HDMI cable → monitor
If you’re using a USB-C-to-HDMI adapter and that part of the connection may be the problem, see Why Doesn’t My USB-C to HDMI Adapter Work? for the adapter-specific checks.
If your laptop has a suitable direct display output, temporarily bypass the dock, hub or adapter and connect the monitor directly.
Microsoft recommends removing accessories such as docks and dongles while troubleshooting external-monitor problems because this helps isolate the connection.
If the direct connection works
That is a useful result.
It suggests concentrating your next checks on:
- the dock, hub or adapter;
- its connection to the laptop;
- its cable;
- the particular port being used;
- relevant manufacturer drivers or firmware.
Some docks depend on system drivers and firmware as well as the physical connection.
If the direct connection still does not work
Do not assume the dock caused the problem.
Continue isolating the cable, monitor and laptop.
Test the monitor with another computer if possible
If you have another suitable laptop or computer available, connect the monitor to it.
Start with the same cable if practical.
If the monitor works on another computer
The monitor itself becomes less likely to be the main problem.
Concentrate more closely on:
- the original laptop;
- its display output;
- the dock or adapter, if one is involved;
- Windows;
- relevant laptop or dock updates.
If the monitor also fails on another computer
That makes the monitor, cable or monitor-side connection more suspicious.
Try not to replace the monitor based on one test alone. If possible, repeat the test with a known-working suitable cable before deciding that the monitor itself has failed.
If you do not have another computer available, simply skip this test. There is no reason to buy or borrow hardware just to complete every step in the guide.
If you are connecting the monitor with USB-C
USB-C needs an extra compatibility check.
A laptop having a USB-C-shaped port does not automatically mean that port can send video to a monitor. USB-C cables can also support different capabilities.
If you are unsure about the laptop itself, first check whether your laptop’s USB-C port supports a monitor.
If your USB-C monitor is already charging the laptop but still does not show a picture, see USB-C Monitor Charges Your Laptop but Shows No Picture. Charging confirms that power is passing through the connection, but it does not by itself confirm that the video path is working.
There is no need to repeat the full USB-C compatibility troubleshooting here. Once USB-C is involved, confirming that the port, cable and any adapter actually support video is more useful than repeatedly changing Windows display settings.
If this exact monitor setup used to work
If the same:
- laptop;
- monitor;
- cable;
- port;
- dock or adapter
worked previously, basic compatibility becomes a less likely explanation.
At this point, graphics resets, Windows updates and manufacturer updates become more relevant.
Reset the Windows graphics driver
If a previously working external monitor has suddenly stopped being detected, Microsoft suggests trying:
Windows + Ctrl + Shift + B
This resets the graphics driver.
The screens may briefly flicker while Windows performs the reset.
Check Display settings again afterwards.
Check Windows and manufacturer updates
Check Windows Update
Open:
Settings > Windows Update
Then check for available updates.
If updates are installed, restart when Windows asks you to and then test the monitor again.
Do not assume that an available update was definitely the cause of the problem. This is simply another sensible check once the basic connection has been ruled out.
Check your laptop manufacturer’s updates
If the monitor worked previously, or you are using a dock or USB-C/Thunderbolt connection, it is also worth checking the laptop manufacturer’s official update utility or support page.
Depending on the computer, relevant updates can include:
- graphics drivers;
- chipset or USB-C components;
- Thunderbolt software or firmware;
- dock firmware;
- system firmware or BIOS.
For example, manufacturers such as Dell and Lenovo provide official utilities that can check supported systems for relevant driver, firmware and BIOS updates.
Use the equivalent official manufacturer tool or support site for your laptop rather than a generic third-party driver-updater program.
From technical-support experience, previously working monitor and docking setups can sometimes be restored after the laptop manufacturer’s recommended driver or firmware updates are applied. That does not mean updates are the cause of every display problem, which is why the simpler connection tests should come first.
If the manufacturer recommends a BIOS or firmware update for your exact model, follow its instructions carefully. Keep the laptop connected to mains power and do not interrupt a BIOS or firmware update once it has started.
Do not install firmware from an unofficial download site or change unrelated BIOS settings simply because the monitor is not being detected.
Consider the graphics driver only after the simpler checks
Graphics-driver troubleshooting can be appropriate, but it should not normally be the first thing you try.
By this point you should already have checked:
- Windows Display settings;
- Windows + P;
- a normal restart;
- the display cable;
- the monitor input;
- another cable if available;
- another connection path;
- any dock, hub or adapter;
- manufacturer updates where relevant.
If the problem began after an update, check whether driver rollback is available
Microsoft suggests display-driver rollback when external-monitor problems begin after an update.
To check:
- Search Windows for Device Manager.
- Open Display adapters.
- Right-click the graphics adapter and select Properties.
- Open the Driver tab.
- Look for Roll Back Driver.
Only use this option when there is a reasonable reason to connect the problem with a recent driver change.
If more than one graphics adapter is listed and you are not sure which one drives the external monitor, do not guess. Check the laptop manufacturer’s support guidance for your exact model instead.
If the rollback option is unavailable, do not try to force it.
Reinstall the graphics driver only as a later step
Microsoft also documents uninstalling and reinstalling the display driver when earlier external-monitor troubleshooting has not worked.
This is deliberately near the end of this guide.
Do not start by removing graphics drivers when a loose cable, unsuitable USB-C connection or faulty dock has not yet been ruled out.
If you reach this point, follow Microsoft’s current instructions or the official support guidance for your laptop or graphics hardware.
Avoid third-party programs that promise to scan your computer and automatically replace all of its drivers.
How to tell where the problem probably is
The result of each test is often more useful than the test itself.
| What you find | What it suggests |
|---|---|
| Windows shows two displays | Windows is detecting the monitor; investigate the blank-screen or signal side instead |
| Another cable works | The original cable becomes a strong suspect |
| Another laptop display output works | The original port or connection path deserves more attention |
| A direct connection works but the dock does not | Focus on the dock, adapter or its connection, drivers and firmware |
| The monitor works on another computer | The original laptop or connection path becomes more likely |
| The monitor fails on another computer too | The cable or monitor-side hardware becomes more likely |
| The same setup worked until recently | Windows, drivers, firmware or another recent change becomes more relevant |
| USB-C provides charging but no display | Charging alone does not confirm that the video path is working |
These results are clues, not proof that a particular component has failed.
Where possible, change one thing at a time. That makes it much easier to tell what actually affected the result.
What probably isn’t worth doing yet
Before spending money or making deeper system changes, avoid:
- repeatedly pressing Detect when nothing changes;
- uninstalling graphics drivers as your first fix;
- installing generic third-party driver-updater tools;
- changing unrelated BIOS or UEFI settings;
- replacing a dock before trying a direct connection;
- buying several new cables without first isolating the existing connection;
- replacing the monitor simply because Windows cannot currently detect it.
Most of those actions either add more variables or cost money before you know which part of the setup is actually causing the problem.
When repair or replacement might make sense
Replacement usually is not justified yet if:
- the monitor works correctly on another computer;
- you have not tested another connection path;
- a dock or adapter has not been bypassed;
- you are using USB-C but have not confirmed video compatibility;
- your only evidence is that Windows currently cannot detect another display.
Professional support or hardware repair becomes more reasonable when testing repeatedly points to the same component.
Examples include:
- the monitor fails on more than one suitable computer with a known-working cable;
- one laptop display output consistently fails while another works;
- a dock consistently fails while a direct monitor connection works;
- a port or connector has visible physical damage;
- the manufacturer’s diagnostics or support guidance identifies a hardware fault.
The aim is to have evidence before you replace anything.
Final thoughts
When a laptop will not detect a second monitor, the most useful approach is to narrow the problem down rather than changing several things at once.
Start by confirming whether Windows can see the monitor. If it cannot, work through the physical connection, cable, ports, dock or adapter and monitor before moving towards drivers and firmware.
Once one change makes the second display appear again, stop changing things and note what worked. That gives you a much clearer idea of where the problem was and what to check first if it happens again.