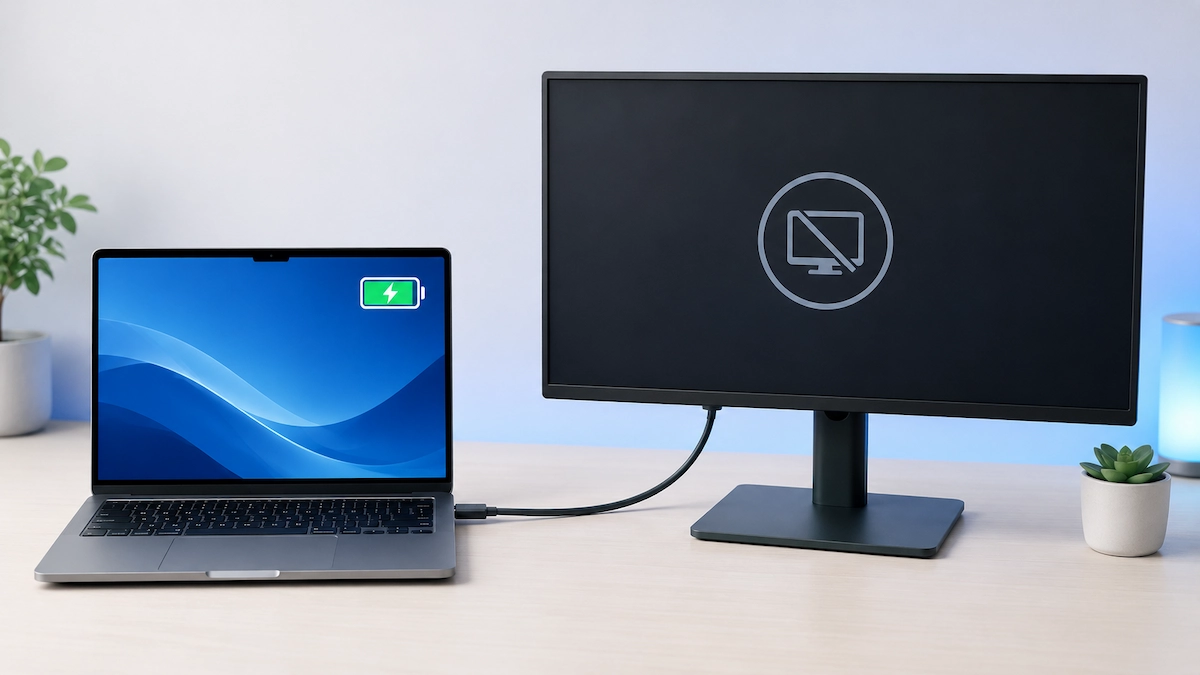
If your USB-C monitor charges your laptop but shows no picture, the connection is only partly telling you what is happening. Power is reaching the laptop, but that does not confirm that a working video signal is reaching the monitor.
Start with the monitor input, cable and USB-C ports before changing Windows settings or assuming something has failed.
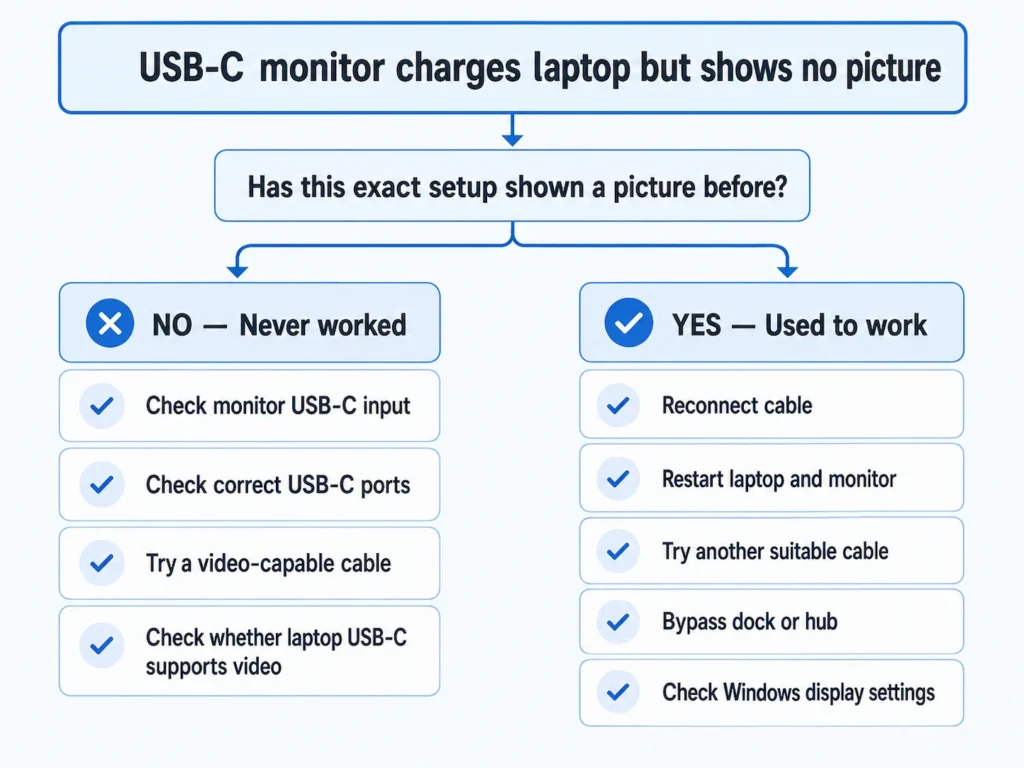
Quick answer: Make sure the monitor is set to its USB-C input, disconnect and reconnect the cable at both ends, and check that you are using the correct USB-C ports on both the laptop and monitor. Then ask whether this exact setup has ever displayed a picture before. If it has never worked, check whether the laptop port and cable support video. If it used to work, restart the laptop, try another suitable USB-C cable and connect the monitor directly before making more technical changes.
Why a USB-C monitor can charge your laptop but show no picture
A USB-C connection may carry power, data and video, but the capabilities depend on the devices, ports and cable being used.
A monitor connected to mains power can use USB Power Delivery to charge a laptop while also acting as a display, as explained by the USB Implementers Forum.
The important point is that charging does not prove that the whole display connection is working.
For USB-C video to work, the laptop, the USB-C port being used, the cable and the display all need to support the required display connection. Microsoft’s USB-C troubleshooting guidance specifically advises checking the computer, display, cable and USB-C port when display functionality is limited.
That means a laptop can continue charging even when there is a problem elsewhere in the video path.
You do not need to understand every USB-C standard to troubleshoot this. Start by checking the simplest parts of the connection.
If you want a simple explanation of what needs to support both functions, see Can USB-C Charge a Laptop and Run a Monitor at the Same Time?
What to check first
1. Make sure the monitor is using the USB-C input
If your monitor has HDMI, DisplayPort and USB-C connections, check which input or source it is currently using.
Use the monitor’s own buttons, joystick or on-screen menu and select the USB-C input if necessary.
The wording varies by manufacturer. It may appear as USB-C, Type-C, USB Type-C or something similar.
If the monitor is already set to the correct input, continue to the next check.
Why this matters: if the monitor is set to another input, it may not show the picture coming through USB-C. The fact that the laptop is charging does not confirm that the correct display input is selected.
2. Disconnect and reconnect the USB-C cable
Disconnect the USB-C cable from both the laptop and monitor.
Make sure both devices are awake, then reconnect the cable firmly at both ends.
Give the monitor a short time to recognise the connection.
Microsoft recommends checking that the cable connecting a PC to an external monitor is secure before moving to more involved troubleshooting in its external-monitor troubleshooting guidance.
If the picture returns, there is no need to keep changing settings.
Why this matters: reconnecting the cable can re-establish the display connection without changing the laptop or monitor configuration.
3. Make sure you are using the correct USB-C ports
A USB-C plug fitting into a socket does not necessarily mean that particular socket is intended to carry video.
Check both ends of the connection.
On the monitor
If the monitor has more than one USB-C socket, check its manual or the markings beside the ports to find the one intended for connecting a computer for display.
Some monitors use different USB-C ports for different purposes. Dell, for example, documents monitors where some USB Type-C ports support video and others do not in its guidance on USB-C monitor connections with no display.
Do not assume the exact arrangement is the same on every monitor. Check the documentation for your model if the ports are unclear.
On the laptop
If the laptop has more than one USB-C port, their capabilities may also differ.
Microsoft notes that the PC, cable, display and particular USB-C port need to support the required display features.
If you know another USB-C port on the laptop supports an external display, you can test that port instead.
Why this matters: USB-C describes the connector shape, but the functions available through individual ports can vary.
Has this exact USB-C monitor setup worked before?
This question helps decide what to check next.
Think about whether the same laptop and monitor, connected in essentially the same way, have successfully displayed a picture before.
Microsoft’s external-monitor guidance also distinguishes between problems setting up a display and problems with a display setup that previously worked.
If it has never shown a picture
Compatibility deserves attention quite early.
Check these three things:
- whether the laptop’s USB-C port supports external video;
- whether you are using the monitor’s correct USB-C video/input port;
- whether the USB-C cable is suitable for carrying video.
Do not assume that the laptop supports a monitor simply because it charges through the port.
Microsoft’s USB-C guidance states that the computer, external display and cable need compatible display support.
The most reliable place to check the laptop is its manufacturer’s specification page or manual for your exact model.
If you are not sure how to interpret those specifications, see our guide to checking whether your laptop’s USB-C port supports a monitor.
Terms such as DisplayPort over USB-C, DisplayPort Alt Mode, Thunderbolt or USB-C display support may indicate video capability, depending on the device.
If the manufacturer’s documentation clearly says that the USB-C port does not support external video, you have found the reason the connection charges without showing a picture. There is little value in changing Windows display settings after that.
If the port should support a monitor, continue with the cable checks below.
If it used to work
If the same laptop, monitor and connection previously displayed normally, a basic lack of USB-C video support becomes less likely.
Start by restarting the laptop.
In Windows 11:
- Select Start.
- Select Power.
- Select Restart.
Microsoft recommends restarting the PC when an existing external-monitor setup that previously worked suddenly stops working.
You can also switch the monitor off normally and back on before reconnecting the cable.
If the display still does not return, continue with the cable and connection tests rather than changing drivers immediately.
Try another suitable USB-C cable
Charging does not rule the cable out, because USB-C cables do not all support the same functions.
If possible, try:
- the USB-C cable supplied for use with the monitor; or
- another cable you already know works for USB-C video.
Do not use an ordinary phone or charging cable as your only comparison unless you know it supports the required video connection.
Microsoft advises checking that the cable supports the same USB-C features required by the connected device.
You do not necessarily need to buy another cable just to perform this test. If you already have a known-suitable one available, use that first.
If another cable restores the picture consistently, the original cable becomes the likely problem.
Why this matters: swapping one component at a time helps identify the fault instead of changing several things without knowing which one mattered.
Connect the monitor directly to the laptop
If the monitor currently connects through a docking station, USB-C hub, adapter or extension, remove that extra hardware temporarily.
For this test, use the simplest connection available:
Laptop → suitable USB-C cable → monitor
Remove temporarily:
- the docking station;
- USB-C hub;
- adapter;
- extension cable.
Microsoft recommends disconnecting docks, dongles, adapters and other accessories when troubleshooting an external display because simplifying the connection can help isolate the problem.
If the monitor works when connected directly, the dock, hub, adapter or the way it is connected becomes more suspect.
That does not automatically mean the accessory is broken. It may be a compatibility, configuration or connection issue.
If the monitor still shows no picture when connected directly, continue to Windows.
Why this matters: every extra device adds another part to the display path. Removing those parts temporarily makes the fault easier to narrow down.
Check whether Windows is sending a picture to the monitor
Once the physical connection has been checked, look at Windows.
Check the projection mode
Press:
Windows key + P
Windows will show the available projection choices.
For testing, choose Duplicate or Extend.
Microsoft recommends checking the projection mode with Windows + P when an external display is not showing what you expect.
The main options are:
- PC screen only — uses the laptop screen only;
- Duplicate — shows the same picture on both screens;
- Extend — gives you additional desktop space on the monitor;
- Second screen only — uses the external display instead of the laptop screen.
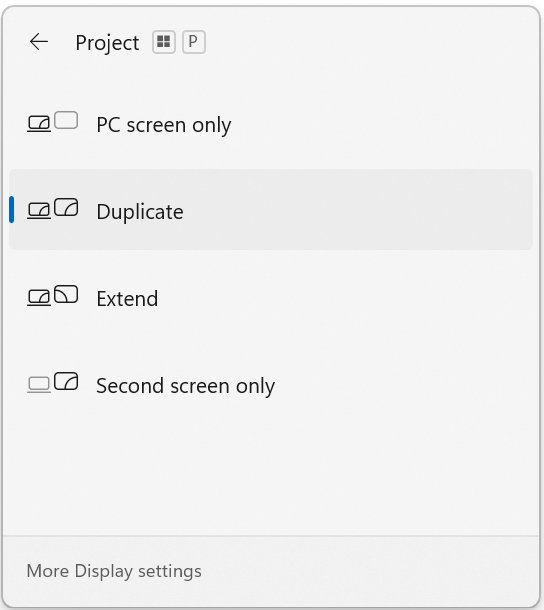
If PC screen only was selected, changing to Duplicate or Extend may be all that is needed.
If changing the projection mode makes no difference, do not keep switching between options.
Check whether Windows detects the monitor
In Windows 11:
- Open Start > Settings > System > Display.
- Expand Multiple displays.
- Select Detect.
Microsoft documents this path in its guide to using multiple monitors in Windows.
If Windows detects the monitor, the connection is at least being recognised at some level, so projection or display configuration deserves more attention.
If Windows cannot detect it at all, the cable, ports, USB-C compatibility or connection path remain stronger suspects.
If Windows cannot detect the monitor at all, see Laptop Won’t Detect a Second Monitor: What to Check for a broader troubleshooting path covering Windows, cables, ports, docks and the monitor itself.
These are diagnostic clues rather than proof that one particular part has failed.
Work out where the problem is
At this point, it is more useful to test individual parts than to keep trying unrelated fixes.
Change one thing at a time.
On mobile, swipe left or right to view the full table.
| Test | If it works | What that points towards |
|---|---|---|
| Try another known-suitable USB-C cable | The picture appears | The original cable becomes the likely problem |
| Try the monitor with another compatible computer | The monitor displays normally | The original laptop or its connection becomes more suspect |
| Try another known video-capable USB-C port on the laptop | The picture appears | The original USB-C port or path becomes more suspect |
| Connect the same laptop and monitor using another supported input such as HDMI | The picture appears | The monitor panel and laptop graphics output are at least partly working |
| Remove a dock or hub and connect directly | The picture appears | The dock, hub or adapter path becomes more suspect |
Microsoft specifically recommends trying another cable and, where possible, testing the monitor with another system to help isolate whether the problem is with the monitor or computer.
These results are clues rather than absolute proof.
For example, if the monitor works with another computer, that makes a complete monitor failure less likely, but there could still be a problem affecting one particular input or connection.
Likewise, if HDMI works but USB-C does not, that does not automatically mean the USB-C socket is broken. The USB-C port, cable, compatibility or connection path still needs to be considered.
The aim is to narrow the problem down before making bigger changes.
Further checks if there is still no picture
If the basic checks have failed, look for updates and model-specific guidance before changing drivers manually.
Check for manufacturer driver, firmware and BIOS updates
If the monitor still shows no picture after the cable, ports and Windows checks, check for updates provided by the laptop manufacturer.
Start with Windows Update, then use the manufacturer’s own update utility if one is available for your computer. These tools can identify updates for the exact system rather than relying on generic driver-download websites.
For example:
- Lenovo provides Lenovo System Update for supported systems, which can check for Lenovo drivers, BIOS updates and other system software.
- Dell provides Dell Command | Update for supported Dell business computers, which can check for BIOS, firmware, driver and application updates.
Other manufacturers may provide their own equivalent support or update utility.
Pay particular attention to updates related to:
- graphics;
- USB-C or Thunderbolt, where applicable;
- chipset and system firmware;
- docking stations, if one is being used;
- BIOS or UEFI firmware.
Install the manufacturer’s recommended updates and restart the laptop when prompted. Then reconnect the monitor and test the USB-C display again.
This step is especially worth trying if the same laptop and monitor previously worked together but the display has stopped being detected.
Take extra care with BIOS or UEFI updates. Keep the laptop connected to mains power, follow the manufacturer’s instructions and do not switch the computer off or interrupt it while a BIOS update is being installed.
If the problem began immediately after an update, check the manufacturer’s support information for your exact model before manually uninstalling or rolling back drivers.
When replacing a cable or monitor might make sense
A blank USB-C display does not by itself mean that the monitor needs replacing.
A replacement cable becomes more reasonable when:
- another known-suitable USB-C cable repeatedly restores the picture;
- the original cable is visibly damaged;
- the original cable cannot be confirmed as suitable for video.
A monitor replacement is harder to justify from a No Signal message alone.
Before considering one, look for stronger evidence such as:
- the monitor fails to display from multiple known-compatible devices;
- more than one suitable cable has been tested;
- the relevant input repeatedly fails while another known-working input behaves normally;
- the monitor reports its own hardware error;
- the manufacturer identifies a hardware fault.
Similarly, if one laptop USB-C port repeatedly fails while another known-supported port works with the same monitor and cable, the laptop may need closer investigation.
You do not need to buy new hardware simply because the laptop is charging but the monitor is blank.
Use the tests above to work out which part of the connection is actually failing first.