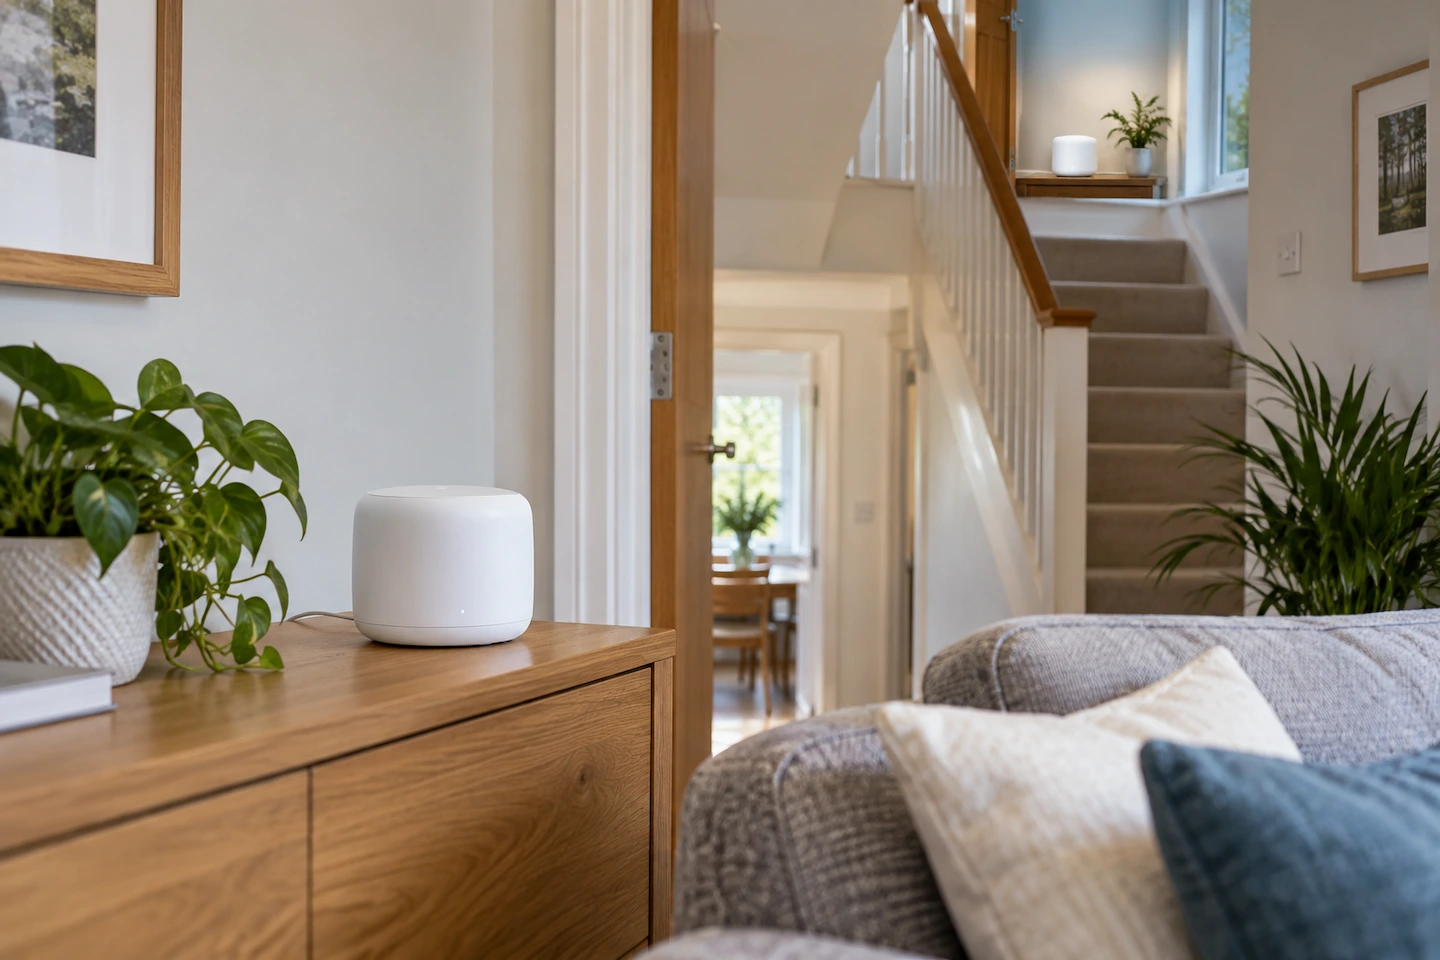
Putting a mesh Wi-Fi node directly in the room with the weakest signal can seem like the obvious choice. But if Wi-Fi is already very weak there, the node itself may struggle to maintain a good wireless connection to the rest of the mesh.
A better starting point is somewhere between the existing mesh and the area you want to improve. The aim is to give the node a reliable connection back to the mesh while still moving useful Wi-Fi coverage towards the problem room or floor.
Quick answer: Put a wireless mesh node somewhere that still has a good connection to your main router or another mesh node while extending coverage towards the weak area.
A hallway, landing or other open position partway towards the problem room can be a useful starting point. Avoid hiding the node inside a cupboard or behind large objects, then use your mesh system’s app or connection test to check the position.
There is no single distance or location that works for every home, so expect to make small adjustments.
The most important rule: don’t put the node too far away
A wireless mesh node has two jobs:
- It needs to maintain a good connection to the rest of the mesh.
- It needs to extend useful Wi-Fi towards the area where you need better coverage.
If you concentrate only on the second job, it is easy to put the node too far away.
Imagine that your main mesh unit is downstairs at one end of the house and a bedroom at the other end has very weak Wi-Fi.
Putting another node inside that bedroom may not solve the problem. If the node receives a poor connection from the rest of the mesh, it has a weak connection to work with.
A better starting arrangement is:
Main mesh unit → node with a good connection → weak room
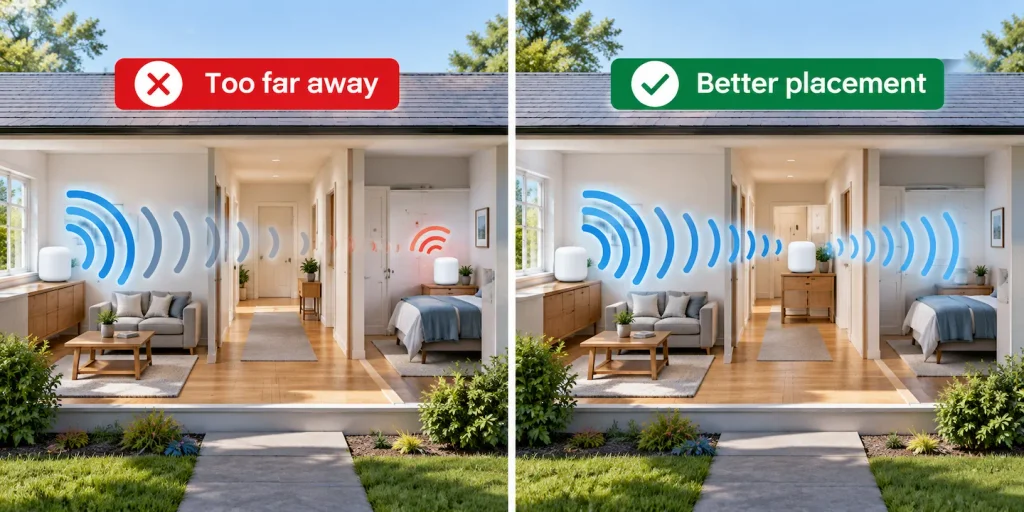
The node does not have to sit at the exact halfway point. It simply needs a position that provides a useful balance between its connection to the mesh and the coverage it provides farther into the house.
If your mesh app reports that a node has a weak connection, try moving it towards the nearest mesh unit before moving it farther into the problem area.
How far apart should mesh Wi-Fi nodes be?
There is no single distance that works in every home.
The useful spacing between mesh nodes depends on factors such as:
- the layout of your home;
- walls, floors and ceilings between the nodes;
- the materials used in the building;
- large objects and furniture;
- the particular mesh system you use.
A distance that works well through an open hallway may perform very differently when the signal has to pass through several dense walls.
Manufacturers sometimes provide suggested distances or numbers of rooms between nodes. For example, Google’s guidance on positioning Nest Wifi and Google Wifi points explains that placement depends on factors such as the size and construction of your home. Treat manufacturer recommendations as starting points rather than measurements you must follow exactly.
The better test is whether the node itself has a good connection to the mesh and whether Wi-Fi has improved in the area you are trying to cover.
Where should you put mesh nodes in a two-storey house?
If Wi-Fi is good downstairs but weak upstairs, it may be worth testing an additional node upstairs rather than keeping every mesh unit on the ground floor.
An upstairs landing or open hallway can be a sensible location to try. It may provide a relatively open route towards several upstairs rooms while still maintaining a connection to the mesh downstairs.
Other useful starting points can include:
- somewhere near the route between the two floors;
- an open position partway towards the weak upstairs rooms;
- a shelf or table rather than a low, enclosed position.
These are places to test, not guaranteed best locations. Floors, walls and the shape of the house can all affect the connection.
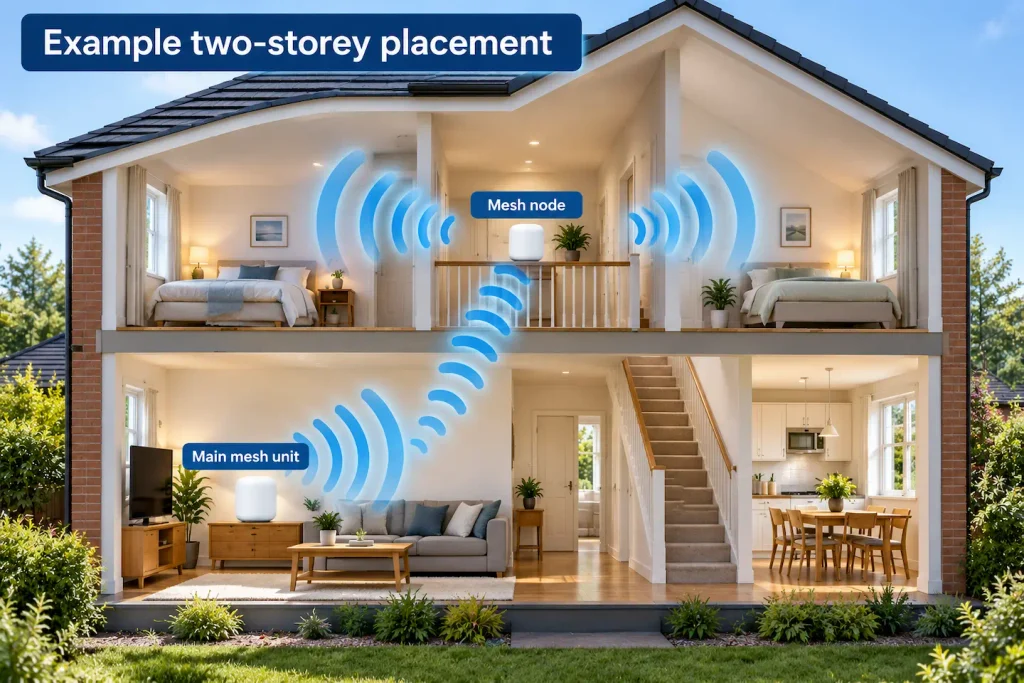
If the upstairs node reports a weak connection to the mesh, try moving it closer to the route towards the downstairs unit. If its connection is good but an upstairs room is still weak, experiment with moving it gradually towards that room.
If upstairs coverage is your main problem, Wi-Fi Works Downstairs but Not Upstairs: What to Try First covers the wider causes worth checking.
Where should you put a mesh node for one weak room?
If most of your home has good Wi-Fi but one bedroom, office or other room is weak, you may not need to put the node inside that room.
Start somewhere between the existing mesh and the weak room.
For example, a hallway outside the room may give the node a better connection back to the mesh while still improving coverage inside the room.
After placing the node:
- Check its connection to the mesh.
- Test Wi-Fi inside the weak room.
- Adjust the position if necessary.
If the node’s connection is weak, move it towards the existing mesh. If the node’s connection is good but the room remains weak, try moving it a little closer to the room.
For other causes of a single problem area, Weak Wi-Fi in One Room: What to Check First can help you decide whether placement is really the issue.
Keep mesh nodes open rather than hidden away
Mesh nodes are often designed to sit unobtrusively around the home, but hiding one completely can work against you.
As a starting point, prefer a reasonably open position such as a shelf, table or other clear surface.
Try to avoid placing a wireless mesh node:
- inside a closed cupboard;
- behind a large television;
- behind substantial furniture;
- on the floor in a cluttered corner;
- immediately beside large metal objects or appliances.
You do not need to create an empty space around every node. The aim is simply to avoid putting unnecessary obstacles between the node and the other parts of the mesh.
If a node has a poor connection in its current position, moving it a short distance into a more open location can be worth trying before making bigger changes.
How to tell whether a mesh node is in a good position
A position that looks sensible is only a starting point. The next step is to check whether it actually works.
Check the node’s mesh connection
Many mesh systems provide an app or another way to check the connection between nodes. For example, Google explains how to test the connection between Nest Wifi and Google Wifi points and use the result to help identify a poorly positioned point.
The wording varies between manufacturers, but you may see a connection-quality indicator, mesh test or warning that a node is too far away.
If your system provides this information, use it. It is more useful than trying to judge placement purely by the physical distance between nodes.
Test Wi-Fi where you actually need it
Next, use Wi-Fi in the room or area you were trying to improve.
You do not need to aim for a particular speed-test number. For an ordinary home setup, the practical questions are more useful:
- Does the device connect reliably?
- Do normal websites and apps work as expected?
- Is streaming or video calling stable if you use it there?
- Has the original coverage problem improved?
The aim is not to create perfect signal strength beside the mesh node. It is to improve Wi-Fi where you actually use it.
What to do if the node’s mesh connection is weak
If your mesh system reports that a node has a weak connection, start with placement rather than buying more equipment.
Try these steps in order:
- Move the node closer to the nearest mesh unit.
- Put it somewhere more open if it is hidden behind furniture or other obstacles.
- If practical, try a shelf or similar raised position instead of leaving it low to the floor.
- Run the mesh connection test again.
- Check Wi-Fi in the original problem area.
Make one change at a time. That makes it easier to tell whether the new position is actually better.
If moving the node closer improves its mesh connection but leaves the target room weak, you can then experiment with moving it slightly back towards that room.
What if the node connection is good but the room still has weak Wi-Fi?
If the node has a good connection but the target room is still weak, try moving it a little towards that room.
After each adjustment, check two things:
- Is the node still maintaining a good mesh connection?
- Has Wi-Fi improved in the target room?
If moving towards the room causes the node’s own connection to become weak, move it back slightly and test again.
Small adjustments make it easier to find a useful position than repeatedly moving the node from one end of the house to the other.
Do more mesh nodes always improve Wi-Fi?
No.
Adding another mesh node can help when there is a genuine coverage gap, but more nodes are not automatically better.
Before buying another one, check whether:
- your existing nodes are sensibly positioned;
- each wireless node has a good connection to the mesh;
- the main mesh router is in a reasonable location;
- moving an existing node improves the weak area.
If the main unit itself is hidden away or poorly positioned, Where Should You Put Your Wi-Fi Router? is worth checking before adding more hardware.
And if you have not yet decided whether a mesh system is the right solution at all, Mesh Wi-Fi vs Wi-Fi Extender: Which Do You Actually Need? explains the difference.
Only consider another mesh node once you have established that sensible placement of the units you already have still leaves a real coverage gap.
What if your mesh nodes use Ethernet?
The placement problem changes if your mesh nodes are connected to each other using Ethernet.
With wireless backhaul, the node relies on Wi-Fi to communicate with the rest of the mesh. Its position therefore needs to provide a good wireless connection between mesh units.
With Ethernet backhaul, traffic between compatible mesh units can use the network cable instead of relying entirely on a wireless connection. This can give you more freedom to position a node where its Wi-Fi coverage is most useful.
Not every mesh system or individual mesh unit supports Ethernet backhaul, so check the manufacturer’s documentation before planning around it.
You do not need Ethernet backhaul simply to make a mesh system work. For many homes, sensible wireless node placement is enough.
A simple mesh Wi-Fi placement checklist
If you are not sure where to start, use this sequence:
- Find the room or floor where Wi-Fi is weak.
- Identify the nearest existing mesh unit.
- Start with the additional node partway towards the weak area.
- Keep it reasonably open rather than hidden behind large objects.
- Check the node’s connection to the mesh.
- Test Wi-Fi in the problem area.
- If the node connection is weak, move it closer to the existing mesh.
- If the node connection is good but the problem area is still weak, move it gradually towards that area.
- Retest after each meaningful change.
- Optimise the nodes you already have before assuming you need another one.
There is rarely one perfect location that can be calculated in advance. Start with a sensible position, test it and make small adjustments until both the mesh connection and coverage in the problem area are working well.