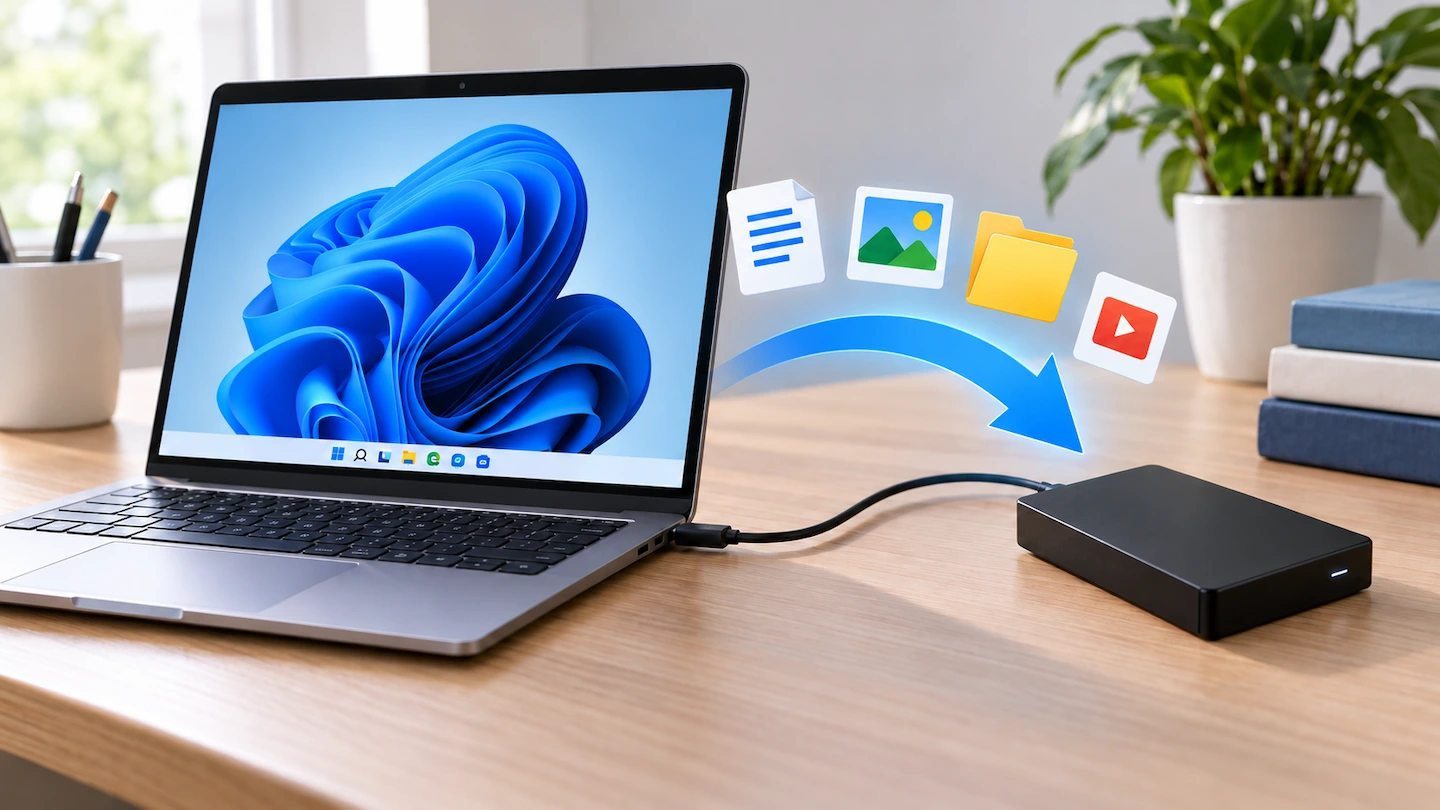
You can back up files to an external drive in Windows 11 without installing extra backup software. For a simple backup, you can copy your important files and folders to the drive using File Explorer. If you want Windows to keep making updated copies for you, File History is the better built-in option.
The important part is choosing the method that matches what you actually want to protect — and checking afterwards that the files really are on the external drive.
Quick answer: For a straightforward backup, connect your external hard drive or SSD, open File Explorer and copy the personal folders you want to protect onto the drive.
If you want Windows to make ongoing backups and keep previous versions of files, use File History instead.
Whichever method you choose, do not stop once the copy or backup appears to have finished. Open the external drive afterwards and check that the files you expect are actually there.
Windows Backup is different: its folder-backup feature uses OneDrive rather than creating this type of backup on your external drive.
Choose how you want to back up your files
There are two sensible built-in approaches for most Windows 11 home users.
| If you want… | Use… |
|---|---|
| A straightforward copy of important files now | File Explorer |
| Ongoing backups and previous versions of files | File History |
Neither approach is automatically better for everyone.
If you simply want to make a separate copy of your important files today, File Explorer is usually the easiest place to start.
If you want Windows to keep backing up changed files over time, File History requires a little more setup but is better suited to an ongoing backup routine.
Before you start, check the external drive
Connect the external hard drive or SSD to your computer before setting anything up.
- Open File Explorer.
- Select This PC in the left-hand pane.
- Look for the external drive under your available drives.
- Open it to make sure Windows can access it.

The drive may appear using its manufacturer name or simply as something such as D: or E:.
If the drive appears normally and you can open it, you can move on to the backup itself.
It is also worth checking that the drive has enough free space for the files you want to protect. If you are unsure, How Much Storage Do You Need for a Computer Backup? explains how to estimate this without buying more storage than you need.
If Windows cannot see the drive at all, skip down to the troubleshooting section before trying to create the backup.
How to back up files to an external drive in Windows 11 with File Explorer
Using File Explorer is the simplest approach if you want to make a separate copy of your files without setting up an automatic backup system.
1. Find the files you want to protect
Open File Explorer and locate the folders containing your important files.
For many home users, these will include folders such as:
- Documents
- Pictures
- Desktop
- Videos
- Downloads, if you keep important files there
- any other folders you have created for personal files
Do not assume these are the only locations that matter.
If you are not sure what should be included, What Files Should You Back Up on a Home Computer? explains which files are normally worth protecting and which ones you can usually leave out.
2. Open the external drive
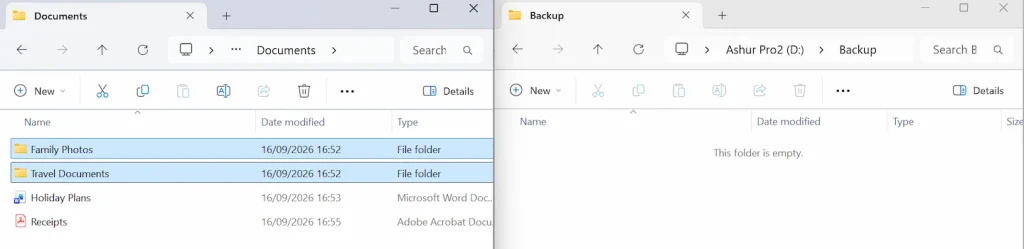
In a second File Explorer window, open This PC and select the external drive.
You can create a folder on it with a clear name such as:
PC Backup
or:
Laptop Backup
If more than one computer will use the same external drive, giving each computer its own backup folder can make the contents easier to identify later.
3. Copy the files to the external drive
Select the files or folders you want to back up.
Choose Copy, then open the backup folder on the external drive and choose Paste.
You can also use the standard keyboard shortcuts:
- Ctrl + C to copy
- Ctrl + V to paste
For a backup, copying is usually safer than moving.
Copying leaves the original file on the computer and creates another copy on the external drive. Moving the file removes it from its original location, which may leave you with only one copy instead of a backup.
4. Let the copy finish
Large photo, video or document collections can take some time to copy.
Avoid disconnecting the external drive while Windows is still transferring files.
Once the copy has finished, do not assume the job is complete yet. Check the backup before disconnecting the drive.
How to set up File History in Windows 11
Microsoft’s backup and recovery guidance describes File History as a way to save copies of personal files to an external drive or network location.
It is useful if you want Windows to make ongoing copies of your files rather than relying entirely on manual copying.
It can also keep earlier versions of files, which may help if a file is accidentally changed or deleted.
1. Connect the external drive
Make sure the external drive is connected and visible in File Explorer before opening File History.
2. Open File History
In Windows 11:
- Open Control Panel.
- Select System and Security.
- Select File History.
If you could not find File History in the normal Windows Settings app, that does not necessarily mean the feature has been removed. Microsoft currently provides its main File History controls through Control Panel.
3. Check which drive File History will use
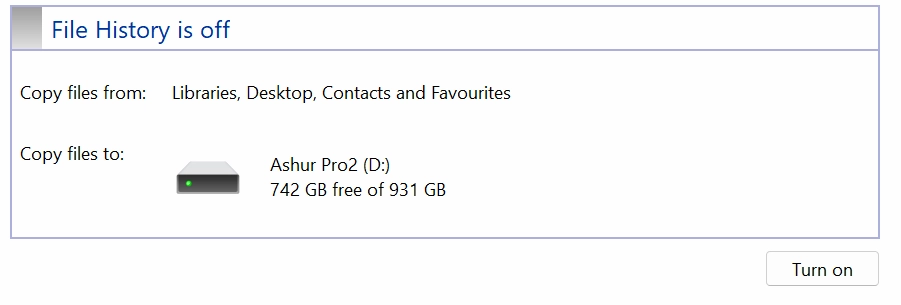
File History should show the drive it intends to use.
Make sure the displayed drive is the external drive you want to use for backups.
If the wrong drive is selected, or no suitable drive is shown:
- Select Select drive.
- Choose your external drive.
- Select OK.
4. Turn File History on
Once the correct drive is selected, choose Turn on.
Windows can then use that drive to store File History backups.
File History is designed mainly to protect personal files. It should not be treated as a complete image of Windows, your installed programs and everything else on the computer.
Make sure you are backing up the right files
A backup is only useful if it contains the files you would actually care about losing.
Typical personal files include:
- documents;
- family photos and videos;
- spreadsheets;
- saved projects;
- important PDFs;
- locally stored email archives, where applicable;
- files stored in custom folders you created yourself.
Pay particular attention to files stored somewhere other than the standard Windows folders.
File History does not automatically mean that every file on every drive in your computer has been protected.
Check OneDrive folders too
OneDrive can make this slightly more confusing because files may appear in File Explorer even when some of them are stored primarily online.
A blue cloud icon beside a OneDrive file means it is currently online-only rather than fully stored on the computer.
If some important OneDrive files show the blue cloud icon, check that they are available locally before relying on a manual external-drive backup. An online-only file may need to download before Windows can create the separate copy you expect.
If you use OneDrive heavily, Windows Backup vs OneDrive: What’s the Difference? explains how Microsoft’s cloud backup and synchronisation features fit together.
Check that the backup actually worked
This is one of the easiest steps to skip, but it is also one of the most important.
If you used File Explorer
Open the external drive after the copying process has finished.
Then:
- Open the backup folder.
- Check that the folders you expected are present.
- Browse into a few of them.
- Open one or two representative files directly from the external drive.
For example, you might open a photo, a PDF and a document.
You do not need to inspect every file individually. The point is to confirm that the external drive contains the expected data and that the files are accessible.
If you used File History
Open File History and confirm that:
- the correct external drive is selected;
- File History is turned on;
- Windows has had an opportunity to run the backup.
If you want to test a full restore later, that is a separate task from simply confirming that File History is running. How to Restore Files From a Backup in Windows 11 explains how to recover files using File History, an external-drive copy or Backup and Restore.
If Windows or File History cannot see the backup drive
Start with the simplest checks rather than changing disk settings or formatting anything.
Reconnect the drive
Disconnect the drive, wait a few seconds and reconnect it.
If the drive has its own power supply, make sure it is switched on.
Try another USB port
A connection problem with one USB port can sometimes make a working drive appear unavailable.
Try another suitable port on the computer.
If the external drive uses a detachable cable, also check that the cable is firmly connected at both ends.
Check File Explorer
Open File Explorer → This PC.
If the drive does not appear there either, the problem is probably broader than File History.
If File Explorer can open the drive normally but File History cannot see it, open File History and use Select drive to choose it manually.
Note: As of September 2026, some Windows 11 users have reported File History failing to recognise an external drive after recent Windows updates even though the drive still works in File Explorer. Microsoft has not currently listed this as a confirmed File History issue. If File Explorer can still access your drive, avoid formatting it, uninstalling security updates or making major system changes just to fix File History.
You can still use the File Explorer method above to create a separate copy of your important files while troubleshooting File History.
Do not format the drive just because it is not appearing
Formatting can erase existing data.
It should not be an early troubleshooting step for a drive that already contains files or backups.
Similarly, there is normally no reason at this stage to start deleting partitions, editing the Registry or making other major system changes.
What this backup does — and does not — protect
An external-drive backup can give you another copy of important personal files if something happens to the originals on your computer.
File History can additionally keep previous versions of supported files.
However, that does not mean the entire computer is protected.
A normal personal-file backup does not automatically include:
- the complete Windows installation;
- every installed program;
- every setting on the computer;
- every file stored in every possible location;
- files you did not select or include.
It is also important to remember that one external drive is still only one additional copy.
If the only two copies of an irreplaceable file are on your PC and an external drive sitting beside it, both could still be affected by theft, fire or another local problem.
You do not need to solve your entire backup strategy today, but it helps to understand what this first external-drive backup does and does not cover.
What to do after the backup
If you are disconnecting the external drive, wait until all copying has finished and use Windows’ Eject option before unplugging it.
Keep the drive somewhere safe and remember to update the backup. If you are unsure whether it should stay plugged in between backups, Should You Leave an External Backup Drive Connected? explains the trade-off between easier automatic backups and better isolation.
If you are unsure how often to update it, How Often Should You Back Up Your Home Computer? explains how to choose a sensible schedule based on how often your important files change.
A backup made today will not contain files you create next month unless you copy them again or use an ongoing system such as File History.
The most useful backup is not necessarily the most complicated one. For most home users, the important first step is simply having a separate, checked copy of the files they would not want to lose.